
My Cart (0)
Table of Contents


ABS is a popular material for 3D printing because it is extremely durable, heat-resistant, and versatile. One of its interesting properties is that it can be post-processed to achieve extremely beautiful final products. We invite you to continue reading this blog, where we will present the best methods for post-processing ABS prints.
Why post-process ABS?
Although strong and functional, ABS often comes off the printer with visible layer lines, rough surfaces, or support marks. Post-processing helps to:
- Improve aesthetics by smoothing surfaces
- Increase strength by removing weak spots
- Prepare prints for painting or further finishing

Support structure removal and initial cleaning
Before we focus on the surface itself, the finished print must first be prepared for post-processing.
Removing supports
To remove supports, use pliers or a blade to remove the supports carefully.
Trimming excess material
There may be plastic particles on the edges that are not part of the print. We advise you to remove everything with a blade carefully.
Cleaning the surface
Since it is important for post-processing that the model is completely clean and without any residue, we recommend removing any dust or other particles with a soft brush or compressed air.
Sanding
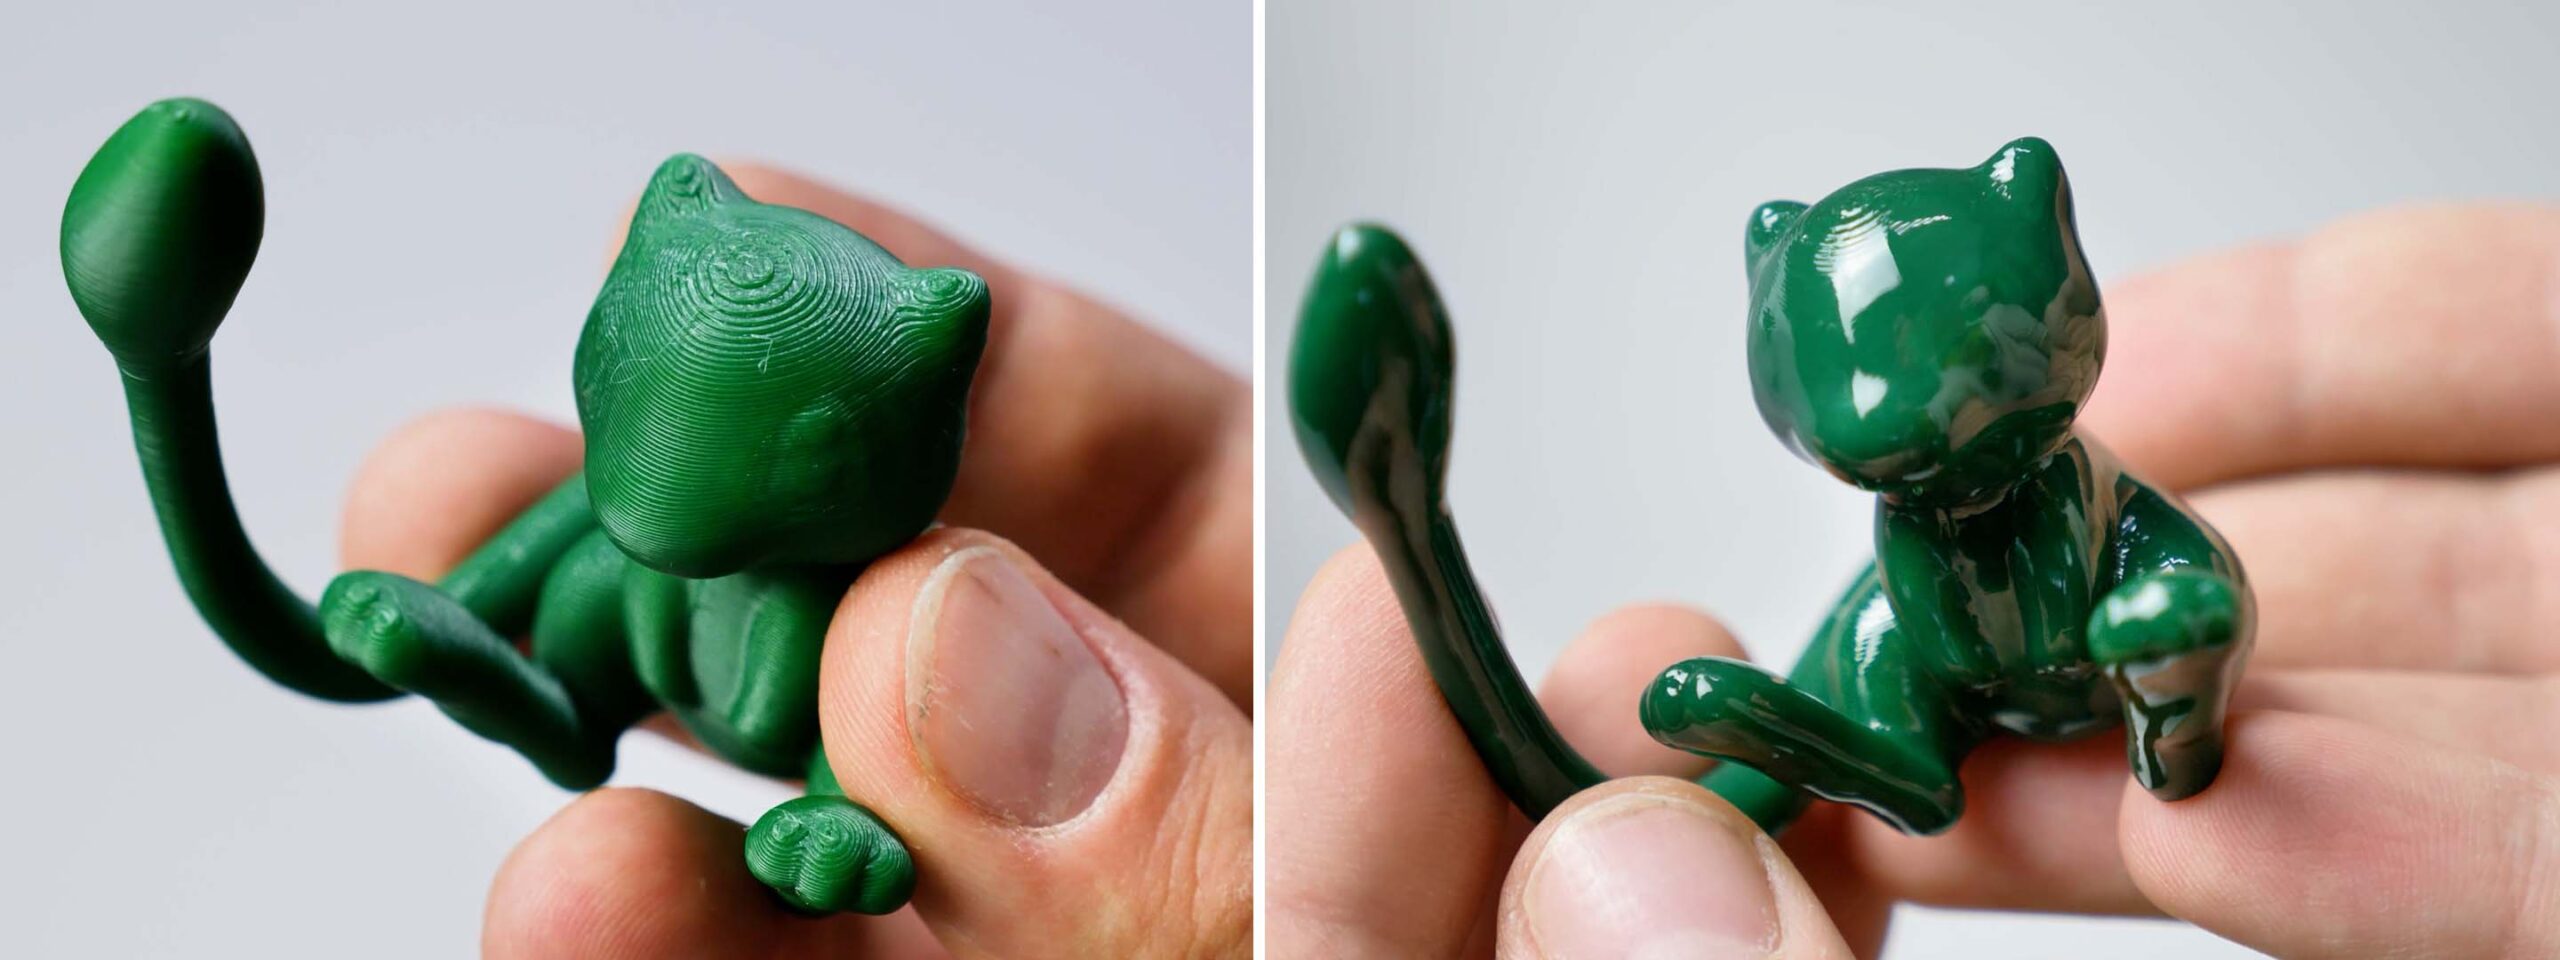
Sanding is a crucial step in post-processing ABS. It reduces the visibility of layer lines and other print imperfections.
Start sanding with coarse grit sandpaper (120-200) to remove the largest imperfections. Once you are satisfied with this, move on to fine-grit sandpaper (400-1000) to achieve a smooth finish.
Optional: You can choose wet sanding, which reduces dust generation and prevents the product from overheating.

Acetone vapour smoothing
Another interesting post-processing technique for ABS is acetone vapour smoothing. Some people first sand their prints and then use this technique, while others skip sanding and only steam-smooth the product.
Vapor smoothing method
Place your product in a closed container (certified to withstand acetone) with a paper towel soaked in acetone. Make sure the paper towel does not touch your product.

Duration
The duration of this process depends on the size and, of course, the details of the product. It can take 30 minutes to a few hours. We recommend using a see-through container and checking in between to see if you have achieved the desired effect.
When you are satisfied with the result, uncover the container and let the product dry completely, otherwise, you will leave your fingerprints on the product itself.
Important: Acetone can be harmful to your health, so do it at your own risk and make sure you have good ventilation.
If you have used the desired colors for your product, the process is complete for you. However, if you want to paint the product, continue with the painting.
Filling and priming
If, after the previous procedures, you still see various irregularities on your product, it is advisable to fill these holes with a filler coat. Once the filler coat has dried, you will need to sand it again.
Once all the irregularities have been removed, you can apply a primer. The primer allows the paints to adhere well to your product. In addition, the colors will be much more intense.
Painting and coating
Painting improves the appearance of your prints, especially if you only use one filament color for printing. In addition, the paint additionally protects the product and allows for longer lifetimes.
It is important to choose the right color, as not all colors adhere well to ABS material. We recommend acrylic paints or spray paints. When applying the color to the product, apply several thin layers. If you apply only one thick layer, it may happen that the color will drip and deform the final appearance.
When you are satisfied with the color, apply a protective clear coat, which will protect the color and of course the entire product.
Tips for success
- Always test your method on a small scrap piece of your print before you start acetone treatment or painting.
- Work in layers: Whether it’s sanding or painting, we recommend working layer by layer to avoid accidentally sanding too much and deforming the product
- Safety comes first: Please always use proper equipment and take care of your health when working with chemicals
Final thoughts
Post-processing ABS prints can transform a rough 3D print into a polished, professional-looking object. Whether you decide to sand, smooth with acetone, or a combination of techniques, it’s crucial to take your time and experiment to find what works best for your project.

Share


 Previous post